
Quick answer
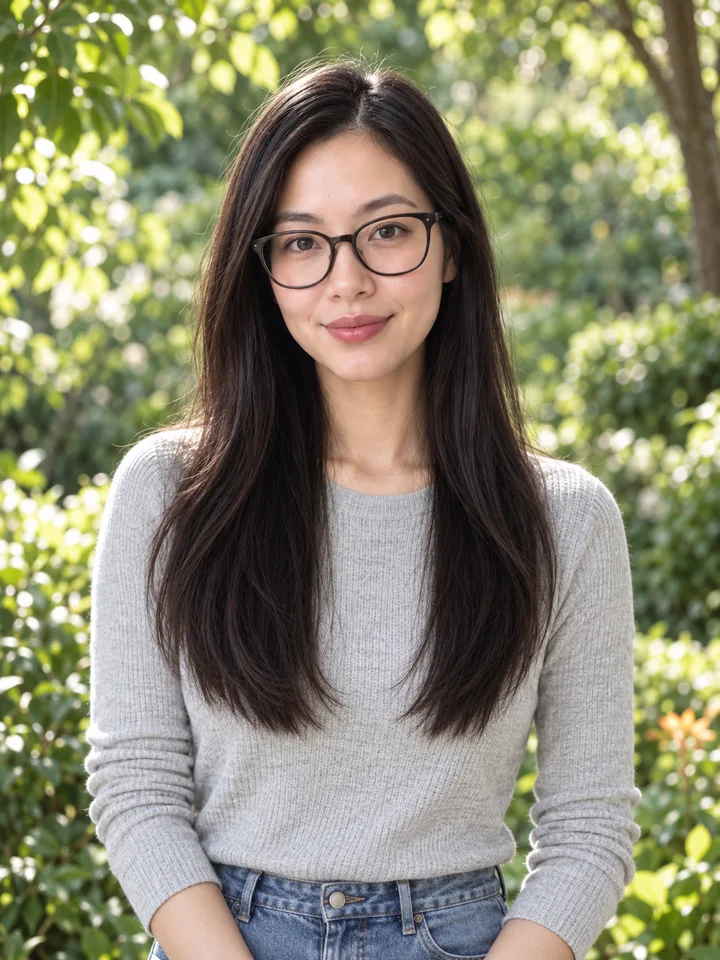
A professional therapist headshot for a website or clinical directory needs to balance approachable warmth with clear professional boundaries. Potential clients browsing directory listings or practice pages look for an authentic, calm visual presence that feels grounded and current. Achieving this balance does not require stiff corporate postures, dramatic studio lighting, or overly casual personal snapshots. Instead, a successful clinical portrait relies on four measurable elements: a relaxed and natural facial expression, non-distracting clothing, a neutral background, and sufficient negative space for multi-platform cropping.
At the same time, mental health professionals must account for privacy and contextual boundaries that other professions rarely face. A directory photo should never disclose personal living quarters, unvetted private decor, or identifying personal items. Furthermore, a portrait cannot create clinical trust or replace therapeutic rapport; its sole functional role is to provide an honest, respectful, and current visual representation of who greets the client at their initial consultation.
Who Should Use This Workflow (and When Another Method Is Safer)
This review and preparation workflow is designed for solo practitioners, group practice associates, and clinical supervisors who need to publish or refresh their portraits across professional directories (such as Psychology Today or GoodTherapy), private practice websites, or multidisciplinary team pages. It offers a structured method to evaluate existing source photos, test subtle background or wardrobe adjustments, and verify framing before public upload.
However, software previews and home capture workflows are not suitable for every situation. You should schedule an in-person session with a professional portrait photographer when:
- Your group practice or clinic mandates a strict, uniform lighting and backdrop standard across all clinician bios.
- You do not have access to a clean, well-lit natural space or a modern smartphone camera capable of sharp capture without distortion.
- You work in specialized forensic, institutional, or public agency settings where official credentialing bodies prescribe precise photographic standards.
When a bespoke studio shoot is impractical or unnecessary, learning to evaluate your own portraits prevents costly mistakes and preserves privacy. For an end-to-end breakdown of household camera setup, see our guide on taking a professional headshot at home.
What to Hold Constant Before Comparing Options
The most frequent mistake clinicians make when refreshing a directory or website portrait is changing multiple variables simultaneously. Swapping lighting, changing posture, altering hair, and trying a new shirt in separate shots makes it impossible to evaluate what actually works.
To make an objective visual decision, hold your core physical baseline constant:
- Current Likeness: Use an unedited, recent photo that accurately reflects how you look today—including your current hairstyle, everyday glasses, and natural skin texture.
- Posture and Distance: Stand or sit upright with shoulders angled slightly (approximately 15 to 30 degrees) toward the camera lens, resting your weight evenly.
- Lighting Direction: Rely on diffuse, indirect natural light—such as facing a window during overcast conditions or standing just inside a shaded doorway. Avoid direct sunlight that creates harsh under-eye shadows or forces squinting.
- Camera Elevation: Keep the lens directly at eye level. Looking down into a lens introduces distortion and foreshortening, while looking up creates an unnatural, detached angle.
By holding your physical presence and capture geometry steady, you can cleanly evaluate styling adjustments one element at a time.
The Four Core Elements: Expression, Clothing, Background, and Negative Space
Clinical directory and website photography requires specific choices across four core visual areas:
1. Expression: Open, Attentive, and Grounded
As noted in therapist discussions on Reddit's clinician community, potential clients respond poorly to severe corporate expressions or exaggerated, artificial smiles. The goal is attentive warmth. Maintain direct eye contact with the camera lens, keep your forehead and jaw relaxed, and adopt a soft, closed-mouth smile or a gentle open smile that engages your eyes. If you feel tense, take a slow breath and reset your shoulders immediately before the shutter clicks.
2. Clothing: Muted Tones and Soft Structure
Clothing should frame your face without competing for attention. Specialist guides such as Goodman Creatives' photo session recommendations suggest solid, mid-tone colors—such as muted blues, slate, forest green, warm charcoal, or soft earth tones.
- Avoid high-contrast patterns: Fine stripes, intricate houndstooth, and tight checks cause visual moiré artifacts on computer screens and mobile displays.
- Avoid high-sheen fabrics: Shiny synthetic materials catch erratic light reflections and appear rigid.
- Select comfortable necklines: Soft collars, gentle crew necks, boat necks, or tailored layers (such as a matte blazer over a simple top) communicate professionalism without creating stiff corporate formality.
3. Background: Neutral, Quiet, and Contextual
Your background must remain secondary to your face. An ideal setting features a quiet interior with soft, neutral walls or an intentionally blurred domestic or office environment. If using an environmental background, ensure the depth of field is shallow enough that objects behind you soften into gentle shapes rather than readable items.
4. Negative Space: Cropping Across Directories and Website Pages
One photo rarely fits every digital placement without deliberate framing:
- Directory Circles: Professional directories predominantly crop uploaded images into tight circles or squares. If your original capture is framed too tightly around your chin and forehead, the platform's automatic circular mask will crop into your hair or neck.
- Website Headers and Bio Cards: A private practice homepage or "About Me" page often requires a rectangular or wide orientation where negative space to your left or right accommodates introductory text.
- Framing Rule: Always capture images with at least 25% to 35% empty margin surrounding your head and shoulders. You can easily crop inward for a directory thumbnail, but you cannot expand a photo that was framed too tightly at the sensor level.
The Boundary and Privacy Check
Therapists handle sensitive professional boundaries that most corporate professionals do not encounter. A profile picture serves the public, meaning clients, colleagues, and strangers will inspect every pixel. Before publishing any headshot to a website or directory, conduct a systematic privacy check:
- Eliminate Identifiable Living Spaces: If you photograph your portrait at home or in a home office, ensure the frame reveals no personal family photographs, children's artwork, identifiable books, or personal mail.
- Obscure Geographic Clues: Check background windows. Prominent street signs, distinctive architectural landmarks, or visible neighboring homes can compromise personal address privacy.
- Inspect Clinical Documents: Ensure that whiteboards, client filing cabinets, intake forms, or computer screens are entirely outside the frame or completely out of focus and illegible.
- Resist the Urge to Over-Disclose: Staging a portrait in a deeply intimate personal space can inadvertently confuse professional boundaries. A simple, neutral wall or soft studio backdrop maintains clean containment.
Crucially, remember that a portrait does not create clinical trust. Therapeutic alliance develops through professional competence, ethical practice, and active engagement during sessions—not through an image file. An authentic headshot simply avoids introducing confusion or false expectations before the first consultation occurs.
Step-by-Step Workflow: From Source Capture to Controlled Review
To update your clinical photo without unneeded expense, follow this four-step sequence:
Step 1: Capture a Clean Natural-Light Baseline
Set up your phone or camera on a stable tripod or solid shelf at eye level, facing an indirect natural light source. Wear a neutral top, position yourself against a simple wall, leave generous negative space above and beside you, and take a series of 5 to 10 photos using a self-timer. Select the single frame with the most relaxed, authentic eye contact.
Step 2: Explore Controlled Variations When Needed
If your captured baseline has minor styling shortcomings—such as a background that is slightly too busy or a shirt color that blends into the wall—you can explore adjustments. If you choose to test styling options using an exploratory tool like LookScene's AI photoshoot tool, make only one controlled adjustment at a time (e.g., testing a slate blue top versus a dark green top against the same pose).
Note on product limits: LookScene is an invitation-preview personal AI photo styling tool for adults using their own photos. It does not provide garment sizing, exact-SKU try-on, wardrobe management, human styling, or team administration. Paid packages are displayed as planned but are not available during the current free invitation preview. Because generative tools can alter facial details, skin texture, fabric, or body proportions, any output must be inspected critically.
Step 3: Conduct a Side-by-Side Fidelity Comparison
Place your generated preview or edited photo directly beside your raw camera capture at 100% zoom. Inspect key landmarks:
- Do your eyes, nose, teeth, and smile lines remain unmistakably your own?
- Did the edit smooth away your natural skin texture or add synthetic makeup?
- Did your hair texture, volume, or natural graying change?
If any facial feature or proportion has drifted, discard the image.
Step 4: Verify Multi-Channel Crops
Download your final approved image and test it in both a 1:1 circle mask (simulating directory thumbnails) and a 4:3 or 16:9 rectangle (simulating practice website bio cards). Ensure your eyes sit roughly in the upper third of the frame and that no awkward cropping cuts off your chin or the crown of your head.
How to Reject Misleading or Unusable Results
Whether reviewing raw self-timer shots, photographer proofs, or software previews, establish rigorous rejection criteria. As highlighted in community discussions on Reddit's directory photo threads, clients immediately notice when an in-person or telehealth clinician does not match their online photograph.
Reject any portrait candidate that displays the following defects:
- Identity and Facial Drift: Any subtle alteration to jawline shape, eye spacing, or distinctive facial features.
- Unnatural Skin Smoothing: A plastic, airbrushed sheen that erases natural skin texture, freckles, or age lines.
- Synthetic Background Artifacts: Floating objects, distorted furniture legs, or impossible architectural angles generated by background tools.
- Fabric Distortion: Collars, seams, or lapels that melt into the skin or display impossible folds.
- Boundary Violations: Any background element that reveals private living quarters or identifying paperwork.
If an edited or generated preview fails any of these checkpoints, reject it immediately. Reverting to a clean, unedited natural-light photograph is always preferable to publishing a synthetic or misleading portrait.
Decision Matrix: Framing and Styling Across Channels
| Channel | Crop & Format | Primary Purpose | Optimal Wardrobe & Background | Primary Risk to Avoid |
|---|---|---|---|---|
| Therapist Directory (e.g., Psychology Today) | 1:1 circular or square thumbnail | Quick visual identification in search feeds | Solid, high-contrast jewel or earth tone; plain, uncluttered background | Tight framing that cuts off hair/chin in circular masks |
| Practice Website Hero | Wide horizontal (16:9 or 3:2) | Introducing the practice philosophy and tone | Softly layered business casual; subtle interior with generous negative space | Background clutter that competes with overlaid navigation or text |
| Website "About Me" Bio Card | Vertical or standard portrait (4:5 or 3:4) | Detailed clinician bio and background | Approachable, structured top; warm, out-of-focus background | Stiff, crossed-arm corporate posture that feels clinical and distant |
| Group Practice Team Page | Uniform square or 4:5 vertical | Demonstrating team cohesion and professionalism | Palette aligned with clinic guidelines; consistent neutral backdrop | Drastic differences in lighting or resolution compared to colleagues |
Trade-offs, Limits, and Real-World Verification
Every photographic approach involves practical compromises:
- Studio Photographers: Deliver exceptional lighting and verified likeness, but require significant scheduling, higher costs, and may default to generic corporate poses if not specifically briefed on clinical warmth.
- DIY Home Captures: Highly accessible, completely authentic, and zero cost, but depend heavily on finding good natural light and adequate negative space.
- AI Styling Previews: Useful for testing whether a specific color palette or neutral background complements your skin tone, but cannot guarantee identity preservation, accurate fabric drape, or true body proportions.
Before uploading any portrait to your live website or directory profile, conduct a real-world verification: send the final candidate to a trusted colleague or friend and ask a single question: "Does this look like me sitting across from you today?" If they hesitate, choose a more natural option.
Final Checklist and Next Action
Before publishing your portrait, verify each item on this pre-flight checklist:
- Current Likeness: The photo accurately reflects your present appearance, including hair, age, and eyewear.
- Warm Expression: Your gaze is attentive, relaxed, and directly aligned with the camera lens.
- Non-Distracting Clothing: Solid, muted colors without moiré-inducing micro-patterns or high-sheen fabrics.
- Negative Space Buffer: The framing allows at least 25% to 35% margin for circular directory cropping.
- Privacy Audit: No personal documents, home decor clues, or external street markers appear in the frame.
- Zero Generative Drift: If an exploratory tool was used, facial landmarks, skin texture, and body proportions have been verified against the unedited source photo.
Next Action: Review your existing practice website and directory profiles today. If your current photo is over three years old, tightly cropped, or set against a distracting background, take 10 minutes to capture a fresh natural-light baseline using the steps above. If you wish to test subtle wardrobe or background variations before a shoot, use LookScene's AI photoshoot tool to explore single-variable changes, making sure to inspect and reject any outputs that alter your natural likeness.


